Ensuring that your Lumina spray gun is correctly connected and that the air pressure etc. is properly configured will improve your productivity and reduce the amount of liquid required. This page has been broken down into four sections containing the basic information required to operate the spray gun. These include “Required Items,” “Connecting the Spray Gun,” “Basic Structure,” and “Basic Usage.”
Required Items
- Automatic Spray Gun
- Air Compressor
- Control Box /3-Port Solenoid Valve/Air Valve
- Container, Tank
- Air Regulator
- Installation/anchoring fixtures
- Tubes
- Fittings

Your automatic spray gun uses compressed air for liquid atomization. This means that an air compressor is required. The amount of air required for a single spray gun is listed in the product catalog. Please ensure that you can supply the gun with the required amount of air and air pressure (0.3 to 0.5 Mpa of pressure is required to turn the gun on and off).
You will also need a control box to turn the gun on and off, as well as a solenoid valve and air valve. A control box and solenoid valve are required when using an input signal to automatically control the spray gun. If you will control it manually, you can use an air valve (hand valve, foot air valve etc.). Control boxes contain both solenoid valves and timers. They make it easier to control the spray gun (please see “Peripheral Equipment” under the product information). If you will use a solenoid valve, please ensure that it is a 3-port type. You will also need devices, such as a regulator to adjust the air pressure, installation/anchorage fixtures, tubes.
Connecting the Spray Gun
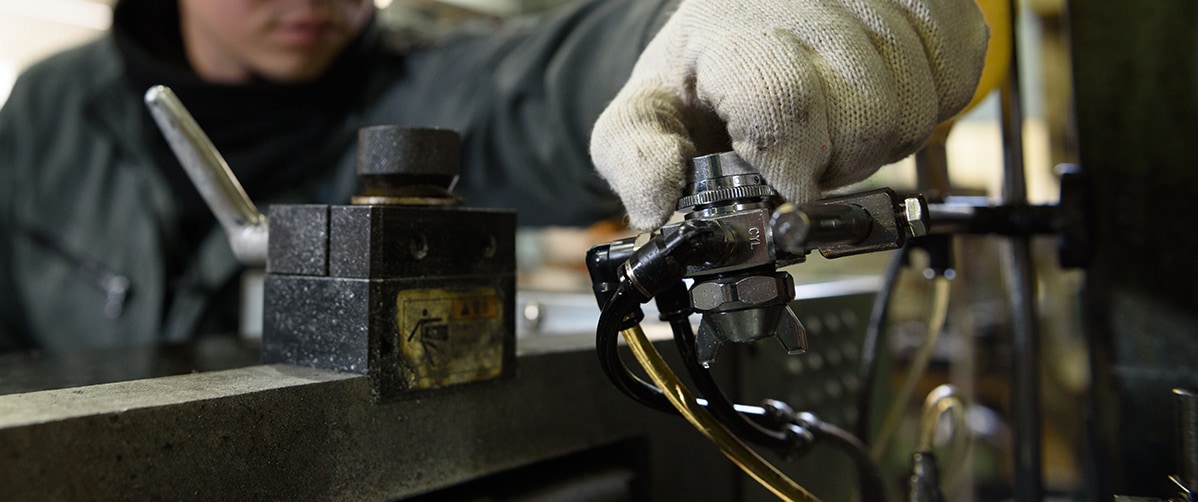
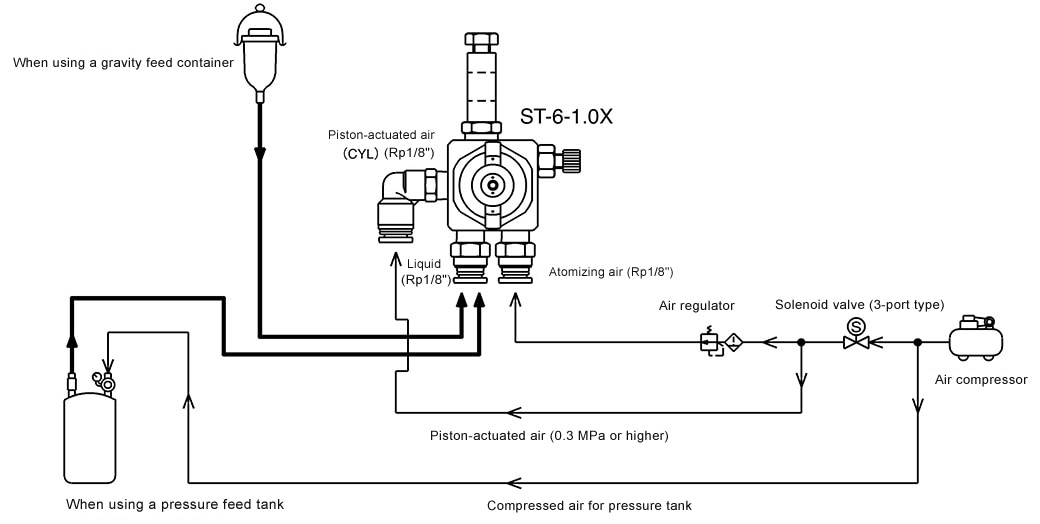
This section will contain an explanation of connecting an ST-6X spray gun that supports two air pipes. The ST-6X features one inlet for liquid, and 2 inlets for air. All have Rp1/8” female threads. Amongst the air inlets, the piston-actuated inlet (stamped with CYL) requires a high air pressure of 0.3 Mpa or more (liquid will exit the gun when air enters this inlet). The second inlet, used for atomizing, has a regulator installed in front of it to allow for the air pressure to be adjusted.
When using the spray gun for applying oil, it is ok for the timing of the air coming from the piston-actuated inlet and the atomizing inlet to be the same. This means it is acceptable to have just one control box or solenoid valve before the point at which the air pipes branch. If you will use a pressure feed tank, this will also need to be supplied with air. The liquid tank is constantly pressurized with air, so this should be connected directly to the compressor without passing it through a solenoid valve. If you have connected the spray gun as in the instructions above, it should look similar to this diagram. This completes the setup of the gun. If you will use two or more spray guns, please branch the individual tubes directly before the point at which the tubes are connected to the three inlets.
Caution is required when using the spray gun for painting and coating purposes. If the timing of the piston-actuated air inlet and atomizing air inlet are the same, when the input air is turned on and off small, insufficiently atomized particles (spits) may exit the gun and soil the surface being coated. In order to avoid this, a small timing difference should be created between these air inlets, to ensure that the air input for the piston-actuated air inlet starts after the input for the atomizing air inlet, and that the input for the atomizing air inlet stops after the input for the piston-actuated air inlet stops. In this case, solenoid valves will be required for both air pipes.
Basic Structure
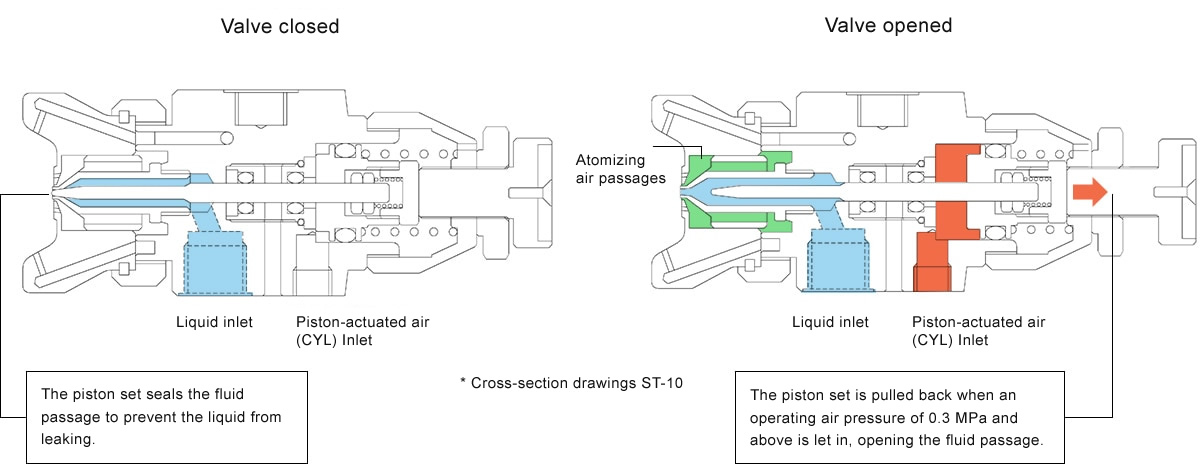
As mentioned above, liquid will exit the automatic spray gun once it receives an air input of >=0.3 Mpa from a piston-actuated air inlet. The internal structure of the spray gun is the same as in the diagram. The left diagram shows when the piston is stopped. The tip of the liquid nozzle is covered using a valve (piston set) so liquid cannot leak out. The right diagram shows the spray gun once >=0.3 Mpa of air pressure has been supplied through the piston-actuated air inlet. The valve (piston set) will be drawn back depending on the air pressure (shown in red), allowing for liquid to pass through the fluid passages. The liquid is then mixed with atomizing air (shown in green) and becomes a spray.
Basic Usage
- Open the liquid adjuster on the spray gun. The adjuster has been designed to not allow liquid to exit if it has only been turned once, so it should be turned around 1.5 times.
-
- (When using a gravity feed container) Draw the liquid out by turning the spray gun on and off repeatedly.
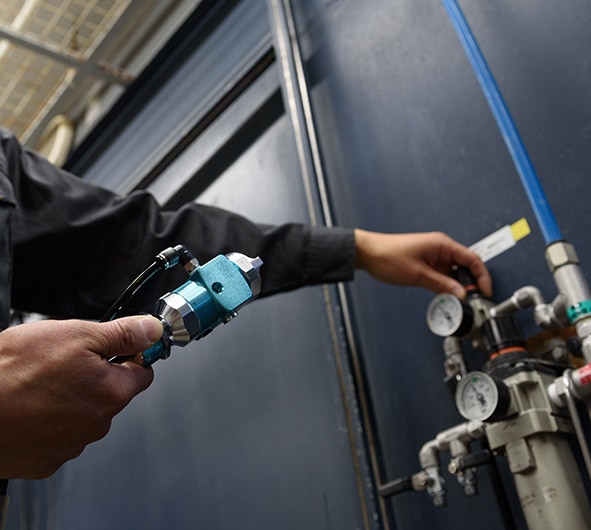
- (When using a pressure feed tank) Air will be provided to the tank from the compressor. After opening the air regulator and increasing the liquid pressure to a certain extent (approx. 0.02 to 0.1 Mpa, depending on the viscosity), draw the liquid out by turning the spray gun on and off repeatedly. Gradually raise the liquid pressure if the liquid still isn’t being supplied to the spray gun.
- Confirm that the regulator for the atomizing air is closed and input piston-actuated air. Liquid will exit the gun once the valve opens; so ensure you increase the atomizing air pressure gradually to create a mist.
- The mist is affected by both the amount of liquid being provided and the atomizing air pressure. To avoid overspraying, reduce the atomizing air pressure as much as possible to make the particles coarser (as in the image on the left). If you want to create a uniform, clean finish when painting or coating, increase the atomizing air pressure to make the particles finer (as in the image on the right). (See the video below for more instructions on using the gun)

This video will introduce how to attach the ST-6 Lumina automatic spray guns and the control box AC-9, pressure feed tank.
We explain how to prevent overspray in the second half of the video.